


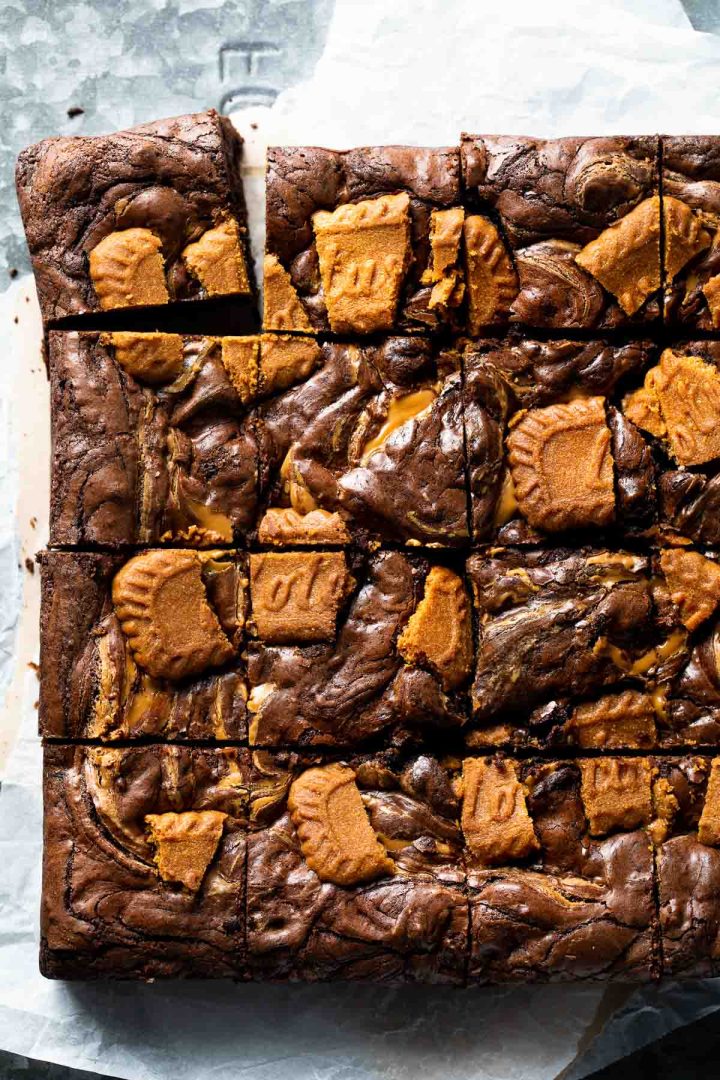
These fudgy Biscoff brownies are packed with pieces of Lotus Biscoff biscuits, chunks of chocolate and topped with a Biscoff cookie butter swirl to create a rich brownie that is a must bake for any Biscoff fan!

It is true to say that my family are huge Lotus Biscoff fans; from 3 ingredient Biscoff butter cookies and Biscoff truffles for a quick and easy sweet treat, to Biscoff cheesecake and Biscoff ice cream which are impressive (but simple!) desserts. Want a fudgy Biscoff treat with brown sugar and no cocoa powder? Then these Biscoff blondies are just the thing!
Jump to:
Why we love this recipe
- These are fudgy chocolate brownies with light, crisp edges, and bursts of Biscoff flavour throughout.
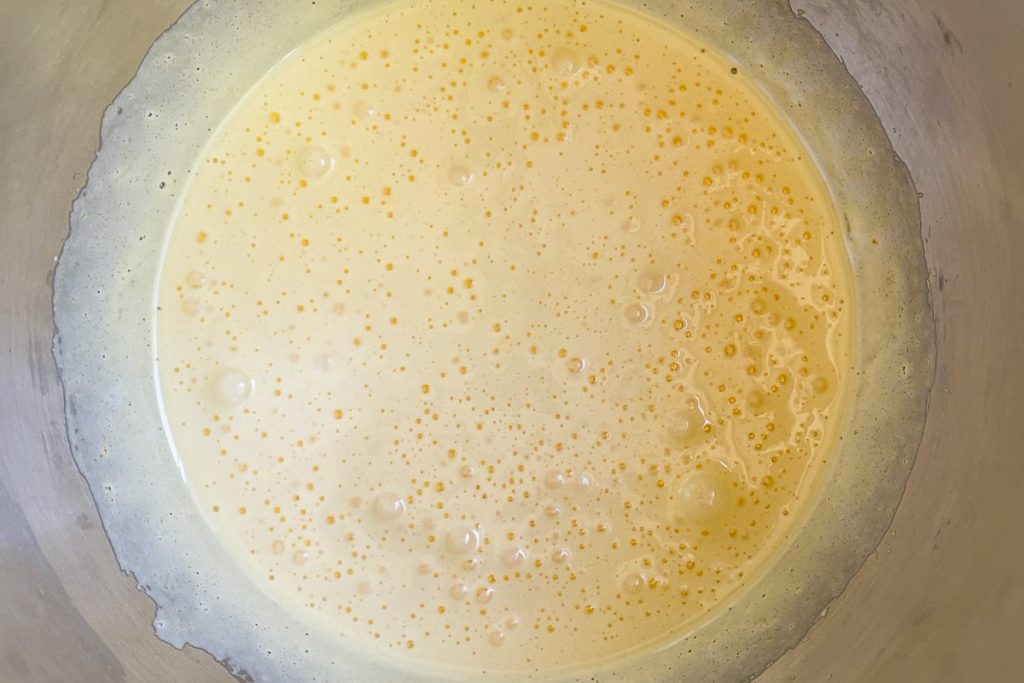
- Whisking the eggs and sugar together until light and fluffy ensures the brownie has crispy meringue like edges and a soft and fudgy centre.
- This easy brownie recipe takes just 15 minutes to prepare.
- Made with melted chocolate, cocoa powder and chocolate chunks, these brownies are guaranteed to satisfy any chocolate craving.
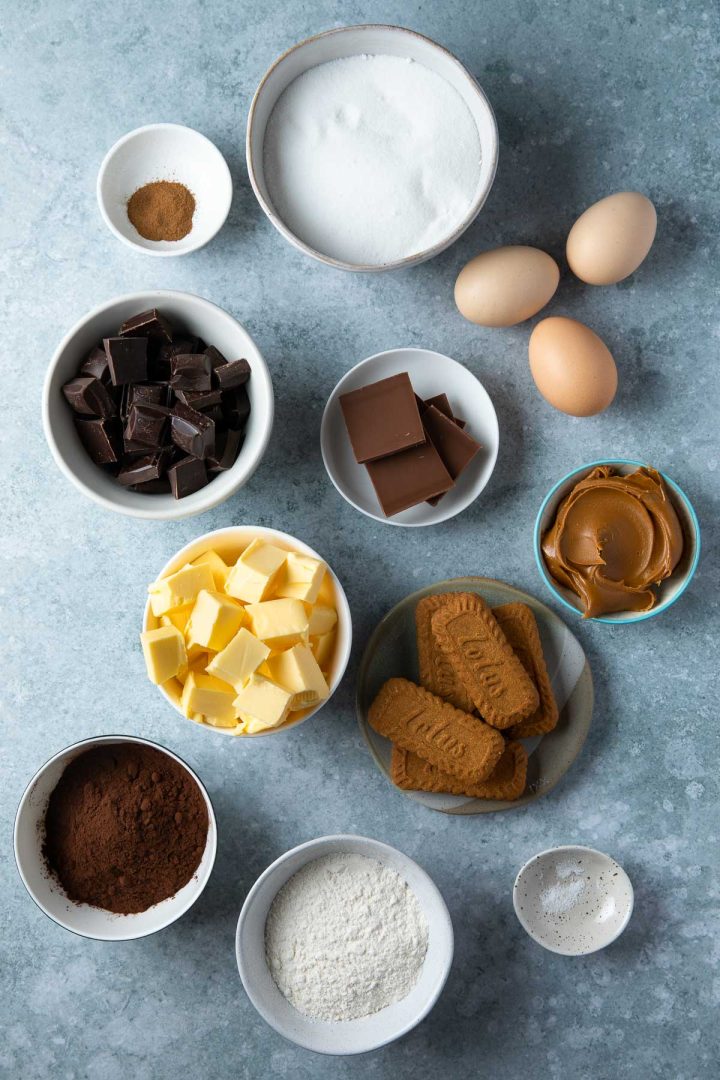
Ingredients notes and substitutions
Please scroll down to the recipe card at the end of the post for ingredient quantities.
- Lotus Biscoff biscuits – lotus Biscoff cookies
- Lotus Biscoff cookie butter spread – Biscoff spread is swirled through the brownie batter to create pools of cookie butter. I personally prefer using smooth cookie butter but if you only have crunchy cookie butter then that should work.
- Dark chocolate – use a good quality chocolate. I like to use Lindt dark chocolate in Australia. If you are in the UK any brand of dark chocolate around 70% cocoa will work.
- Butter – salted butter or unsalted butter. If you use salted butter them omit the pinch of salt.
- Cocoa powder – a Dutch processed cocoa powder will give a deep chocolate taste and rich brown colour to the brownies.
- Eggs – I use large eggs, weighing approx. 55g – 60g each. Use room temperature eggs for the best results.
- Plain flour – all purpose flour.
- Caster sugar – this fine sugar dissolves quickly in baking.
- Ground cinnamon – this is optional, but I love the added cinnamon flavour that works well with the Biscoff.
- Milk chocolate – roughly chop milk chocolate, or use milk chocolate chips, semi-sweet chocolate chips or dark chocolate.
- Salt – this helps enhance the chocolate flavour.
How to make Lotus Biscoff brownies
Please scroll down to the recipe card at the end of the post for the full recipe.
- Melt the chocolate and butter in a double boiler / ban marie (a heatproof bowl set over a pan of barely simmering water, make sure the bowl doesn’t touch the water.) You can also melt the chocolate and butter in a heatproof bowl in the microwave at 20 second bursts, stirring in between.
- Leave the mixture to cool slightly. TIP: you don’t want the chocolate to be super hot when added to the eggs as it can start to cook them.
- Whisk the eggs and sugar until light, fluffy and tripled in size – I find the easiest way to do this is in a stand mixer with the whisk attachment, but you can use a hand mixer / electric mixer if you prefer.
- Add the melted chocolate mixture to the eggs and sugar mixture, and stir to combine.
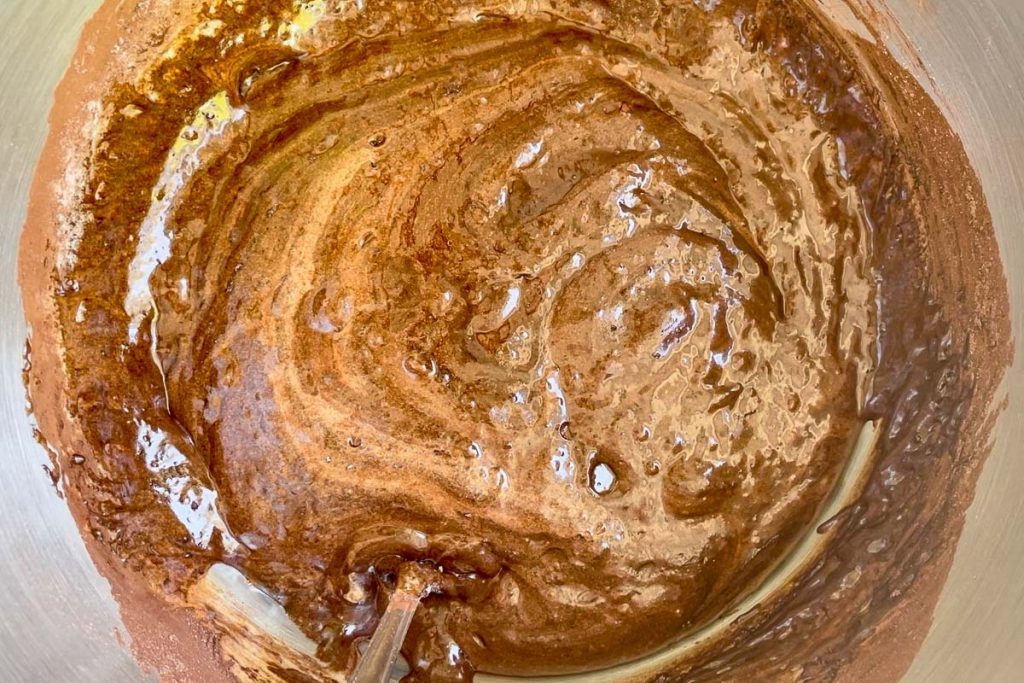
- Sift the flour with the cocoa powder, ground cinnamon and salt and fold in to the mixture.
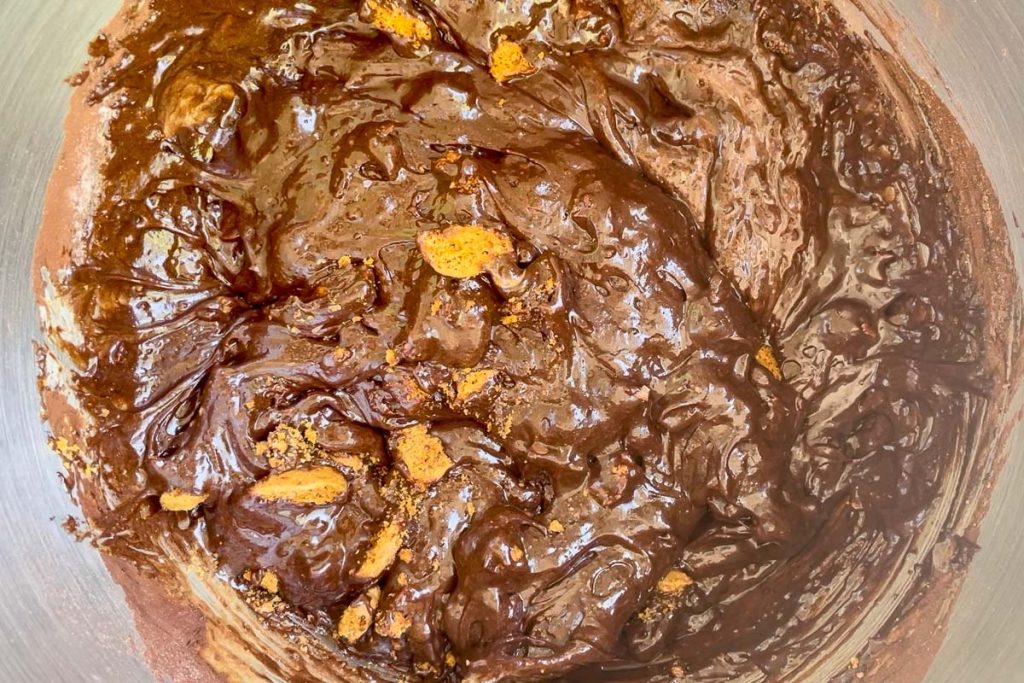
- Gently stir in the Biscoff pieces and chocolate chunks.
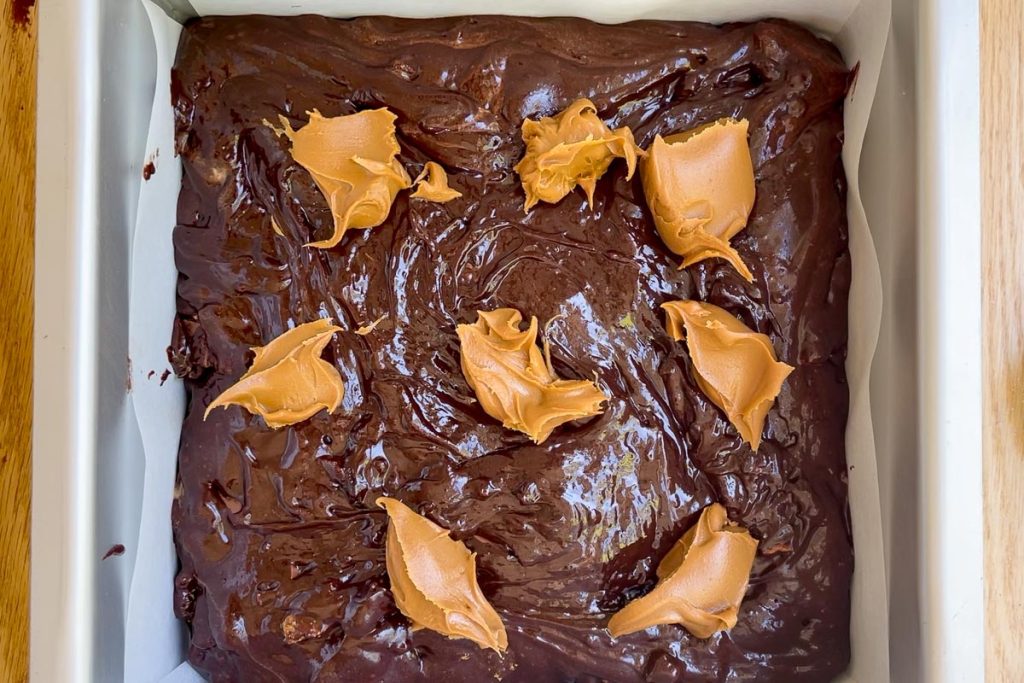
- Pour the batter into a square baking tin lined with baking paper / parchment paper, then dollop teaspoons of cookie butter over the top of the brownie batter.
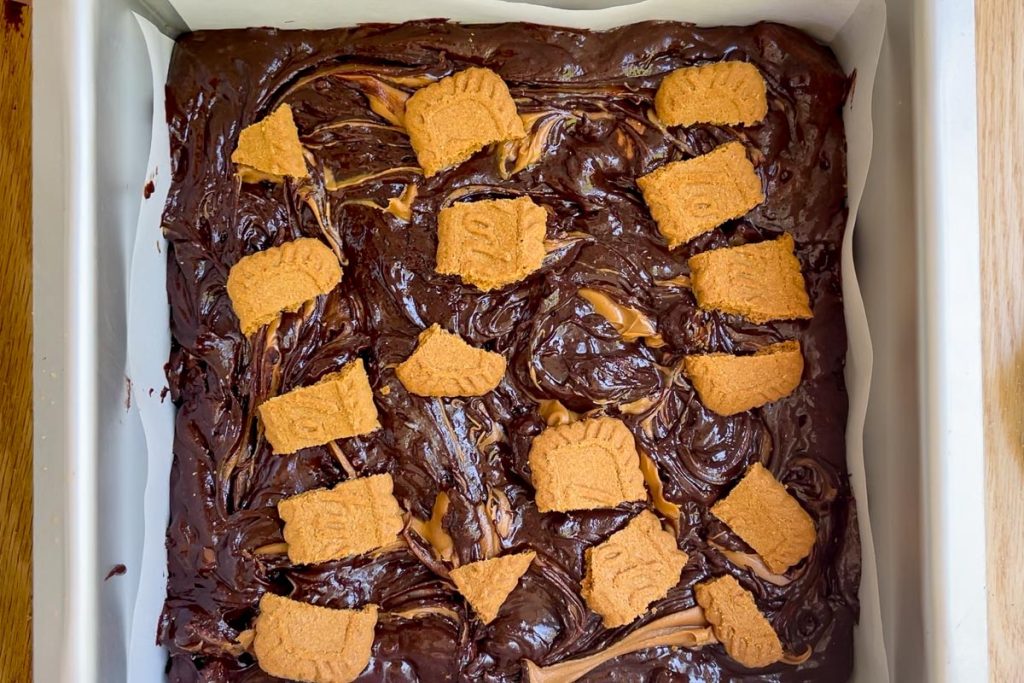
- Using a blunt knife like a butter knife, carefully swirl the cookie butter in to the brownies.

- Top with broken Biscoff biscuits (optional) and place in the preheated oven to bake.
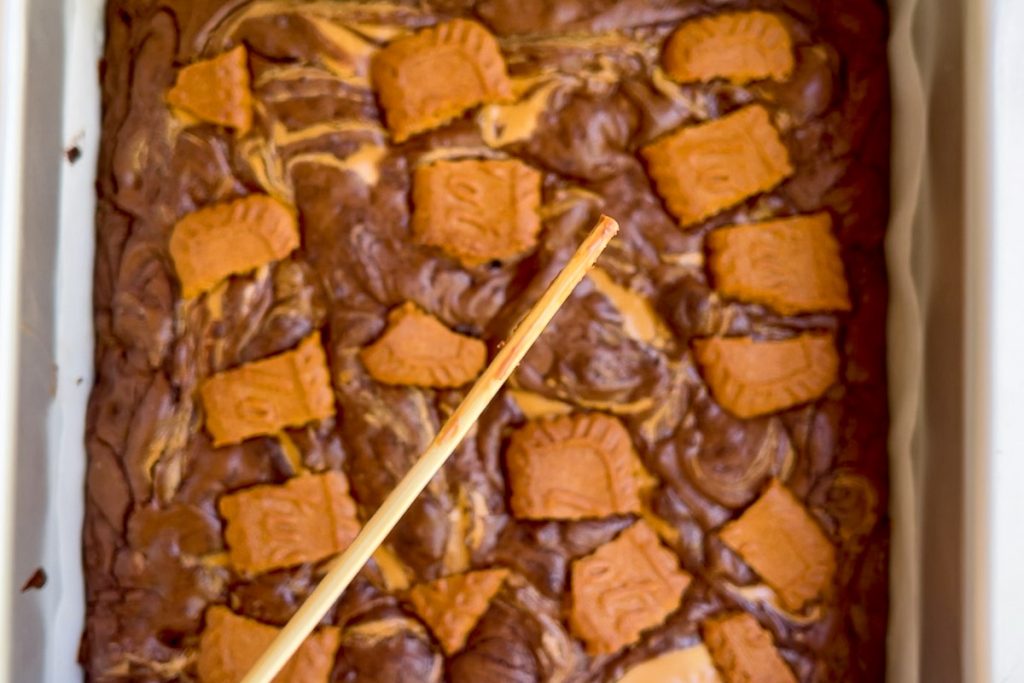
- The brownie is cooked when a skewer / toothpick inserted into the middle of the brownie comes out with a few moist crumbs attached.
- Leave to cool completely in the tin.
FAQ
If you use self raising flour then your brownies can have a cakey texture rather than being fudgy.
The Biscoff biscuits on the top of the brownies are crunchy the day the brownie is made but they soften the next day. The pieces of Biscoff cookie in the brownie soften with cooking but add delicious bursts of Biscoff flavour throughout the brownie.
My recipe tips
- Beat the eggs and sugar until pale and tripled in size – this helps create that light but gooey texture and crispy meringue like edges.
- Stir in the dry ingredients lightly, so you don’t lose all that air you created in the eggs and sugar mixture. Over mixing the batter can lead to tough brownies that won’t rise as well.
- Don’t break the biscuits into too fine a crumb, you want chunks to get that Biscoff flavour.
- When spreading out the cookie butter don’t mix it in too much either, otherwise you will lose the bursts of concentrated Biscoff flavour.
- Don’t over bake the brownie – if you over bake the brownie it will become dry and you lose that fudgy texture.
- Wait until the brownies are completely cold before slicing. If they are still warm when you cut them, they can crumble.
Storage
- Room temperature: store brownies in an airtight container at room temperature for up to 3-4 days.
- Freeze: this brownie recipe freezes well. Wrap the brownies in parchment paper and then a sealable bag / container and freeze for up to a month (any longer than this and I find that the brownies take on strong smells like onion from the freezer.
Variations
- Vanilla – add vanilla essence or vanilla extract instead of the ground cinnamon.
- Other spices – a pinch of nutmeg or ground ginger would be a delicious addition.
More chocolate slice / bar recipes:
Looking for more chocolate recipes? Try these:


Biscoff Brownies
Author: Robyn
Equipment
- 1 20cm x 20cm (8” x 8”) square tin
Ingredients
- 185g (6.5 oz) 70% cocoa dark chocolate roughly chopped
- 185g (6.5 oz) unsalted butter
- 225g (1 c) caster sugar
- 3 eggs size large
- 60g (¼ c plus 2 tablespoons) plain flour
- Pinch salt
- ½ Teaspoon ground cinnamon
- 60g (½ c) cocoa powder
- 10 Biscoff biscuits (80g) broken into chunks
- 60g (2 oz) Milk chocolate roughly chopped
- 3 Tablespoons Biscoff spread (90g)
- 3-4 Biscoff biscuits for the top
Instructions
- Preheat the oven to 160℃ fan / 180℃/ 320℉ convection / 356℉.
- Line a 20 x 20cm (8 x 8") square baking tin with baking paper / parchment.
- In a ban marie (a heatproof bowl set over a pan of barely simmering water), melt the dark chocolate and butter. Cool.
- Using a stand mixer fitted with the whisk attachment, or an electric whisk, whisk the eggs and caster sugar together for 3 minutes until light and tripled in volume.
- Gently stir the cooled melted butter and chocolate into the fluffy beaten eggs and sugar.
- Sift in the plain flour, salt, ground cinnamon and cocoa powder and stir with a spoon until just combined.
- Gently fold in the chunks of biscuits and roughly chopped milk chocolate.
- Pour the mixture into the lined tin and knock gently to release any air bubbles.
- Dot teaspoons of the biscoff cookie butter / spread over the top of the brownie, then using a blunt knife like a butter knife, lightly drag the brownie mixture through the cookie butter to create a marble effect.
- Scatter over 3-4 roughly broken biscoff biscuits.
- Place in the preheated oven and bake for 20-23 minutes, until the brownie doesn't wobble in the middle, and a skewer inserted into the middle of the brownie comes out sticky not raw.
- (If the skewer comes out very sticky and covered in runny batter, return to the oven for 2 minutes and test again.)
- Leave to cool in the tin. Cool completely before cutting in to squares.
- Store in an airtight container at room temperature for 5 days, or freeze for up to 1 month.
Notes
Nutrition
HAVE YOU MADE THIS RECIPE?
I’d love to see your creation!
Or just leave a comment below!
Let me know your thoughts!