

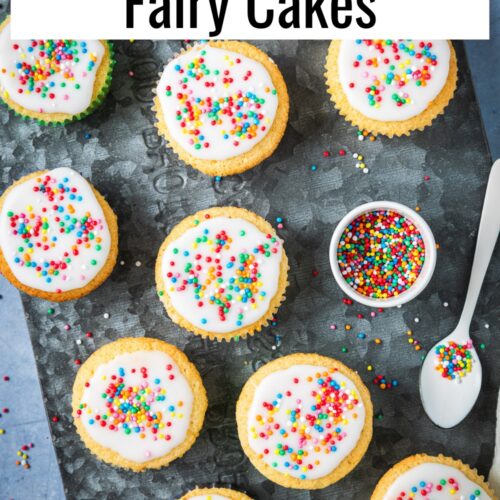
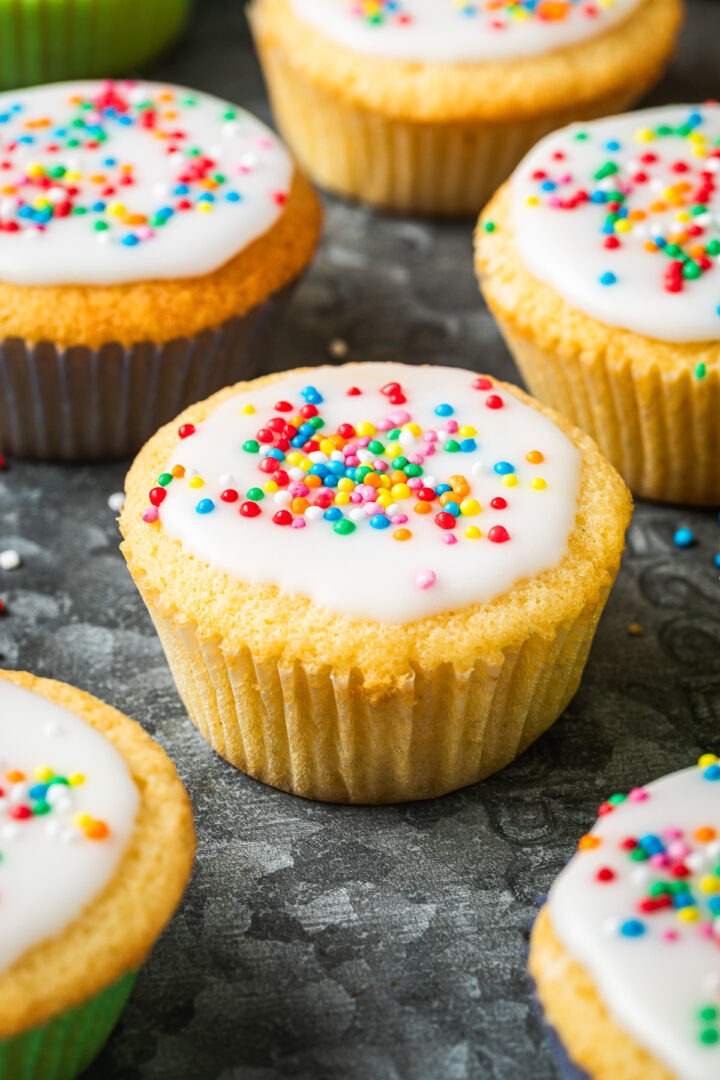
With a simple vanilla sponge topped with icing and sprinkles, these fluffy fairy cakes are a classic bake that are loved by kids and adults! Serve them at birthday parties alongside chocolate rice krispie cakes and sausage rolls, or bake them together in the school holidays for a fun (and nostalgic!) baking project.

I am really enjoying baking retro British bakes; from the village hall favourite coffee and walnut cake, to almond slice and lemon syrup cake; introducing my Australian son to my British baking roots.
Like school cake, there is something about the combination of fluffy vanilla sponge, icing and sprinkles that is sure to delight. Made from simple, basic ingredients, this fairy cake recipe stays moist for days, meaning you can make them ahead of your party or get together, and not have to worry about them drying out.
Jump to:
Newsletter

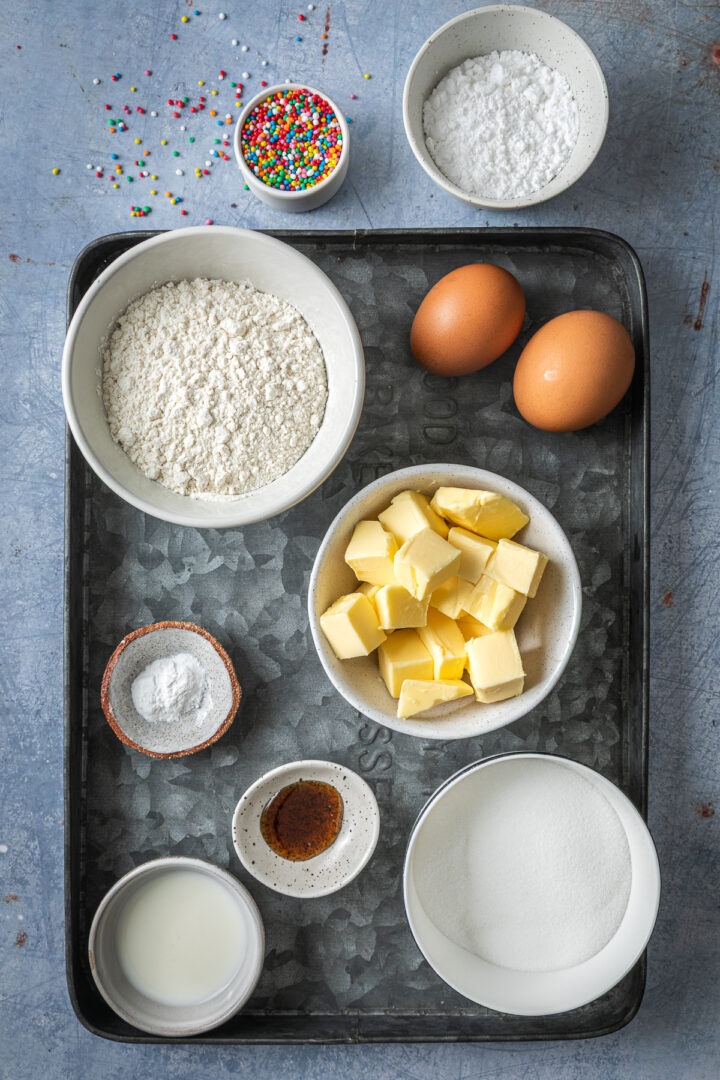
Ingredient notes and substitutions
Please scroll down to the recipe card at the end of the post for ingredient quantities.
- Butter – room temperature butter is really important for being able to easily beat it together with the sugar.
- Caster sugar – also known as superfine sugar. This finer sugar dissolves easier when mixed with the butter, creating a lighter cake.
- Self raising flour – if you only have plain flour / all purpose flour, add an extra 1 ¼ teaspoons of baking powder.
- Icing sugar – if you are in Australia, I recommend using pure icing sugar rather than soft icing sugar, for that retro water icing that is classic on a Fairy cake.
- Sprinkles – it wouldn’t be a fairy cake without sprinkles! (If you are thinking of a cupcake with ‘wings’ it’s a butterfly cake, and I should really bake those too!)
How to make this fairy cakes recipe
Please scroll down to the recipe card at the end of the post for the full recipe.
- Whisk the butter and sugar – whisk them for a while This incorporates air which leads to the fluffiest fairy cakes!
- Add the eggs and dry ingredients – alternate adding the eggs and flour and baking powder.
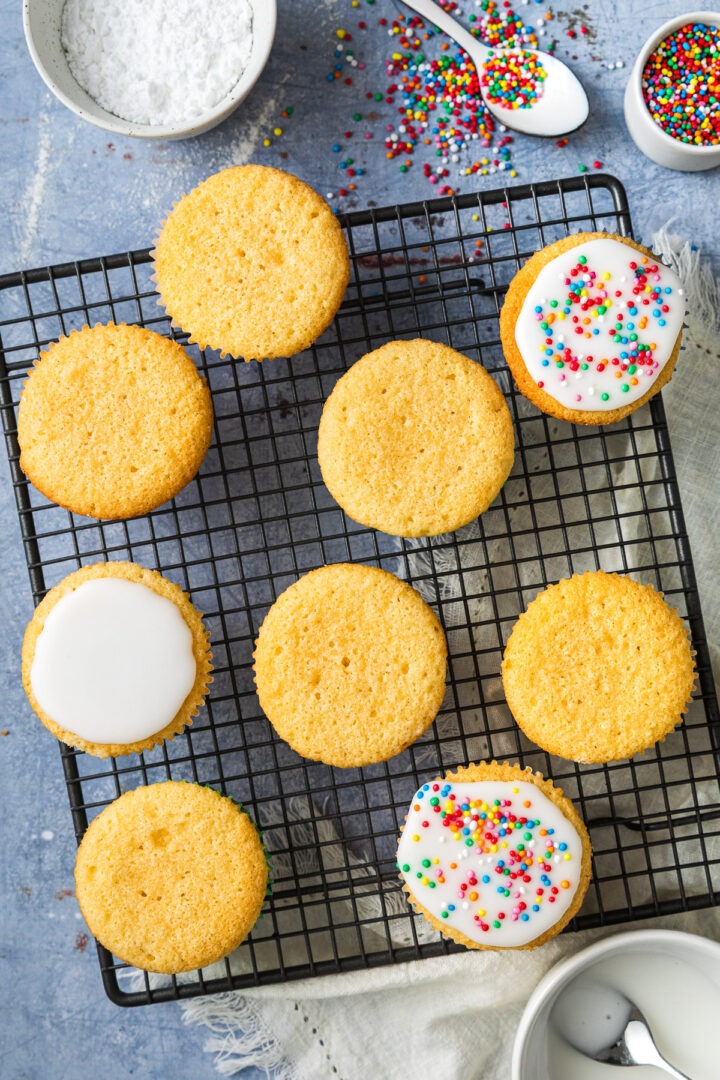
- Bake – the fairy cakes are cooked when they feel firm to the touch when gently pressed, or when a tooth pick inserted into the middle comes out clean.
- Cool and ice – make sure the fairy cakes are completely cold before topping with the icing.
FAQ
Fairy cakes are smaller than cupcakes, with a distinctive flat top, and are topped with a simple water icing rather than buttercream.
You can freeze the fairy cakes, un-iced, for up to 2 months. Wrap well to stop them from absorbing any strong flavours from the freezer.
With their flat tops (which is perfect for topping with a water icing) these fairy cakes aren’t suitable for cutting the top off and filling with buttercream to make butterfly cakes. However these Spanish cupcakes have a great dome for cutting into wings!
My recipe tips
- Whisk the butter and sugar for 5 minutes in a stand mixer – this really makes the difference between having a heavier fairy cake and a super light fairy cake!
- Sieve the icing sugar before using – to prevent a lumpy icing.
- Room temperature eggs – use room temperature eggs to help stop the batter from splitting.
Why not try…
You may also like these other fun baking recipes for kids:


Soft and Fluffy Fairy Cakes
Author: Robyn
Equipment
- 12-hole cupcake / muffin tin
- 12 cupcake cases
Ingredients
- 110 g butter softened
- 110 g caster sugar
- ½ teaspoon vanilla bean paste or vanilla extract
- 110 g self raising flour
- ½ teaspoon baking powder
- 2 eggs
- 1-2 tablespoons milk
Icing
- 125 g icing sugar
- 2-3 tablespoons water
- sprinkles
Instructions
- Preheat the oven to 160℃ fan / 180℃ / 350℉.
- Line a 12-hole cupcake / muffin tin with 12 cupcake cases.
- Beat the butter, sugar and vanilla together in a stand mixer or electric beaters for 3-5 minutes until light and fluffy – this is what gives you light fairy cakes.
- Mix the flour with the baking powder.
- Add one egg to the butter-sugar mixture and beat in, then add half the flour and stir to combine.
- Repeat with the other egg and rest of the flour.
- Gently mix in the milk – you want to have a dropping consistency, where the batter just drops off the spoon. You may not need to use all the milk.
- Spoon into the cupcake cases and bake for 15-17 minutes until they spring back when touched, or a toothpick inserted into the middle of them comes out clean.
- Leave to cool in the tin for 5 minutes, then carefully lift the fairy cakes out of the tin and leave to cool completely on a wire cooling rack.
- Once completely cold, make the icing.
Make The Icing
- Sift the icing sugar into a large bowl.
- Add the water a little at a time, stirring in between until you get a smooth icing.
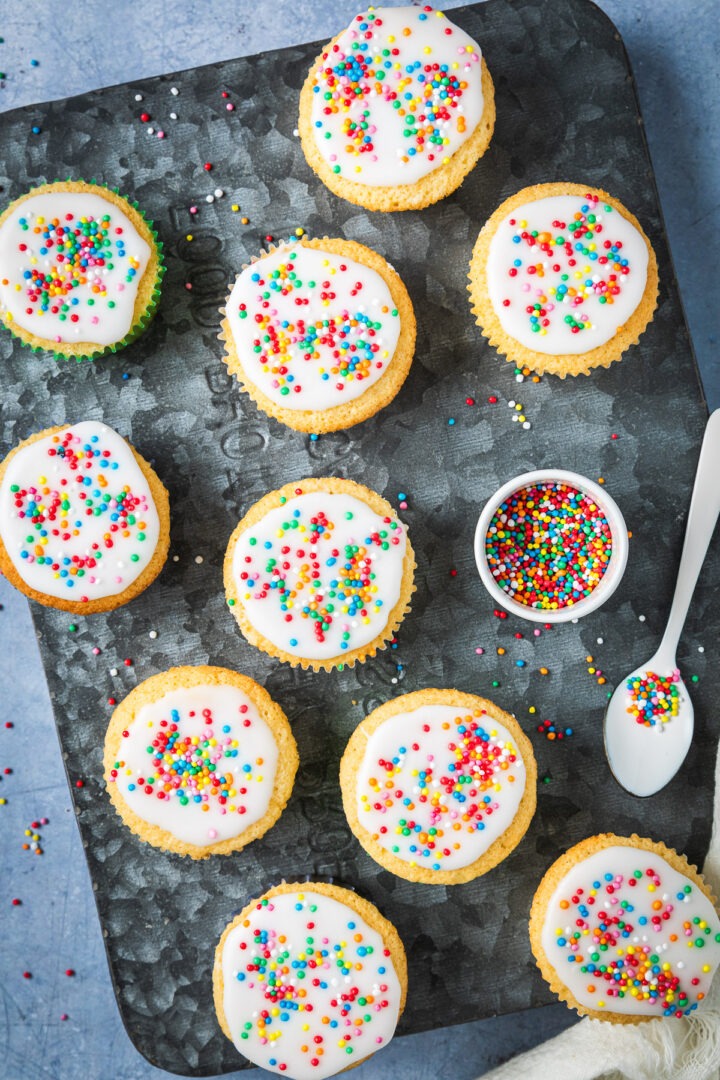
- Spoon the icing on to the top of each cooled cake, then sprinkle with the sprinkles and set aside for the icing to harden.
- Store in an airtight container at room temperature for up to 3-4 days.
Notes
- Butter – room temperature butter is really important for being able to easily beat it together with the sugar.
- Caster sugar – also known as superfine sugar. This finer sugar dissolves easier when mixed with the butter, creating a lighter cake.
- Self raising flour – if you only have plain flour / all purpose flour, add an extra 1 ¼ teaspoons of baking powder.
- Icing sugar – if you are in Australia, I recommend using pure icing sugar rather than soft icing sugar, for that retro water icing that is classic on a Fairy cake.
- Sprinkles – it wouldn’t be a fairy cake without sprinkles! (If you are thinking of a cupcake with ‘wings’ it’s a butterfly cake, and I should really bake those too!)
Nutrition
HAVE YOU MADE THIS RECIPE?
I’d love to see your creation!
Or just leave a comment below!
Ingredients
- 110 g butter softened
- ½ c caster sugar
- ½ teaspoon vanilla bean paste or vanilla extract
- ⅔ c self raising flour
- ½ teaspoon baking powder
- 2 eggs
- 1-2 tablespoons milk
Icing
- 125 g icing sugar
- 2-3 tablespoons water
- sprinkles
Instructions
- Preheat the oven to 160℃ fan / 180℃ / 350℉.
- Line a 12-hole cupcake / muffin tin with 12 cupcake cases.
- Beat the butter, sugar and vanilla together in a stand mixer or electric beaters for 3-5 minutes until light and fluffy – this is what gives you light fairy cakes.
- Mix the flour with the baking powder.
- Add one egg to the butter-sugar mixture and beat in, then add half the flour and stir to combine.
- Repeat with the other egg and rest of the flour.
- Gently mix in the milk – you want to have a dropping consistency, where the batter just drops off the spoon. You may not need to use all the milk.
- Spoon into the cupcake cases and bake for 15-17 minutes until they spring back when touched, or a toothpick inserted into the middle of them comes out clean.
- Leave to cool in the tin for 5 minutes, then carefully lift the fairy cakes out of the tin and leave to cool completely on a wire cooling rack.
- Once completely cold, make the icing.
Make The Icing
- Sift the icing sugar into a large bowl.
- Add the water a little at a time, stirring in between until you get a smooth icing.
- Spoon the icing on to the top of each cooled cake, then sprinkle with the sprinkles and set aside for the icing to harden.
- Store in an airtight container at room temperature for up to 3-4 days.
Notes
- Butter – room temperature butter is really important for being able to easily beat it together with the sugar.
- Caster sugar – also known as superfine sugar. This finer sugar dissolves easier when mixed with the butter, creating a lighter cake.
- Self raising flour – if you only have plain flour / all purpose flour, add an extra 1 ¼ teaspoons of baking powder.
- Icing sugar – if you are in Australia, I recommend using pure icing sugar rather than soft icing sugar, for that retro water icing that is classic on a Fairy cake.
- Sprinkles – it wouldn’t be a fairy cake without sprinkles! (If you are thinking of a cupcake with ‘wings’ it’s a butterfly cake, and I should really bake those too!)
Nutrition
HAVE YOU MADE THIS RECIPE?
I’d love to see your creation!
Or just leave a comment below!
Ingredients
- 3¾ oz butter softened
- ½ c caster sugar
- ½ teaspoon vanilla bean paste or vanilla extract
- ⅔ c self raising flour
- ½ teaspoon baking powder
- 2 eggs
- 1-2 tablespoons milk
Icing
- ¾ c icing sugar
- 2-3 tablespoons water
- sprinkles
Instructions
- Preheat the oven to 160℃ fan / 180℃ / 350℉.
- Line a 12-hole cupcake / muffin tin with 12 cupcake cases.
- Beat the butter, sugar and vanilla together in a stand mixer or electric beaters for 3-5 minutes until light and fluffy – this is what gives you light fairy cakes.
- Mix the flour with the baking powder.
- Add one egg to the butter-sugar mixture and beat in, then add half the flour and stir to combine.
- Repeat with the other egg and rest of the flour.
- Gently mix in the milk – you want to have a dropping consistency, where the batter just drops off the spoon. You may not need to use all the milk.
- Spoon into the cupcake cases and bake for 15-17 minutes until they spring back when touched, or a toothpick inserted into the middle of them comes out clean.
- Leave to cool in the tin for 5 minutes, then carefully lift the fairy cakes out of the tin and leave to cool completely on a wire cooling rack.
- Once completely cold, make the icing.
Make The Icing
- Sift the icing sugar into a large bowl.
- Add the water a little at a time, stirring in between until you get a smooth icing.
- Spoon the icing on to the top of each cooled cake, then sprinkle with the sprinkles and set aside for the icing to harden.
- Store in an airtight container at room temperature for up to 3-4 days.
Notes
- Butter – room temperature butter is really important for being able to easily beat it together with the sugar.
- Caster sugar – also known as superfine sugar. This finer sugar dissolves easier when mixed with the butter, creating a lighter cake.
- Self raising flour – if you only have plain flour / all purpose flour, add an extra 1 ¼ teaspoons of baking powder.
- Icing sugar – if you are in Australia, I recommend using pure icing sugar rather than soft icing sugar, for that retro water icing that is classic on a Fairy cake.
- Sprinkles – it wouldn’t be a fairy cake without sprinkles! (If you are thinking of a cupcake with ‘wings’ it’s a butterfly cake, and I should really bake those too!)
Nutrition
HAVE YOU MADE THIS RECIPE?
I’d love to see your creation!
Or just leave a comment below!
Robyn says
My go to cupcake / iced buns recipe!